Ironhead Transmission Remove And Install
Text and Pictures by Mark Trotta
Recently a viewer emailed about a shifting problem he was having with his 1969 Sportster. One of his questions was how to remove the transmission assembly without the specialty tool listed in the factory manual.
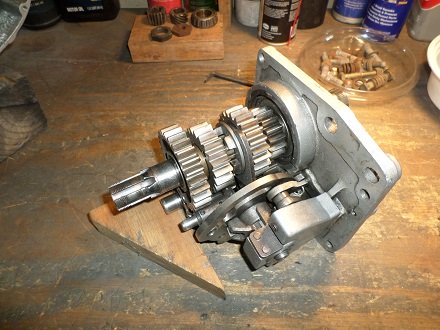
Getting Started
Drain primary oil and remove the cover, then remove the clutch, primary chain, and gears.
TIP: Before removing transmission unit, measure the lateral play of the mainshaft on the right side where the sprocket is mounted. This will make shimming easier during re-assembly.
Removal
Although the factory service tool is still available in the aftermarket, I use another way to remove the transmission unit.
Once the trap door is clear and the four bolts are removed, very slowly and carefully, I pry the access cover with a right-angle screwdriver.
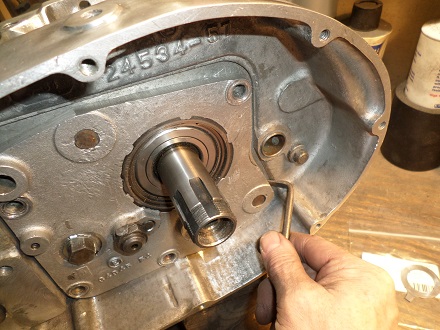
Loosen one spot a little, then loosen another spot opposite that one, repeat until loose. Once it is loose, use your other hand to help push the unit out from the other side.
This method will take a few minutes, but you're not banging on anything, so you'll cause no damage.
Alternative Removal Method
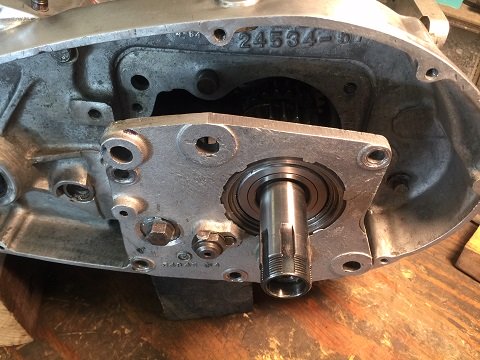
Here's another way to remove the transmission unit:
After the four bolts are removed, slowly strike the sprocket side with a rubber mallet with your right hand, while guiding the unit out with your left hand.
Whatever method you choose, remove the assembly as slowly as you can. No matter how careful you are, Ironhead transmissions usually do not come out in one piece!
If you work too quickly while removing it, gears, washers, and roller bearings will fall every which way.
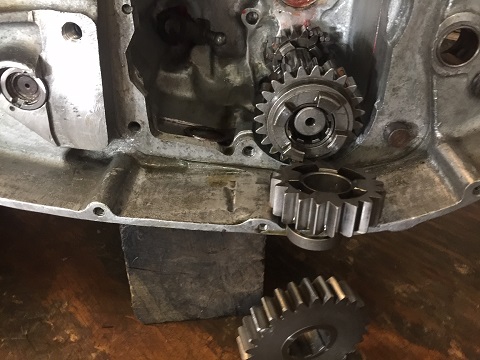
Sometimes when removing, the countershaft will stay in the case and the rest will come out with the access door. Other times, the gears on the countershaft will fall off when pulled out of the cases.
Removing the unit in one piece is not impossible, just unlikely!
******************
Mainshaft Bushing Rollers
There are 23 small, loose roller bearings, or bushing rollers, that ride in the transmission pinion race.
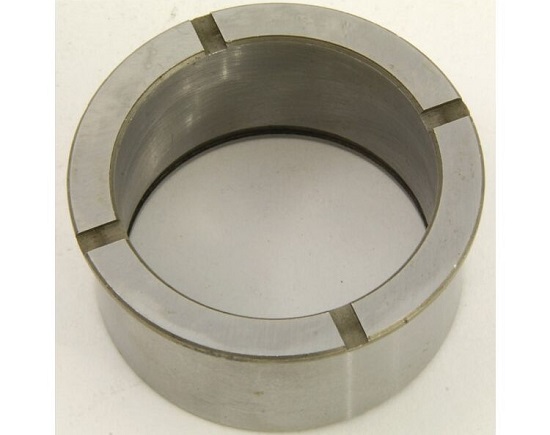
The pinion race is also referred to as a mainshaft race.
TIP: As you pull the unit out, the rollers will fall out all over the place, so put some rags around the motor and try not to lose any of them.
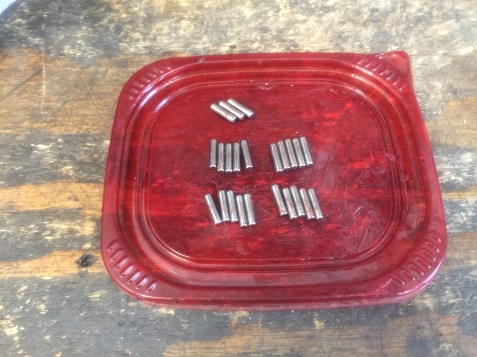
It's a good idea to round up all 23 immediately after removing the transmission to make sure you haven't lost one. If yours are damaged or missing you can buy a set of replacement rollers here.
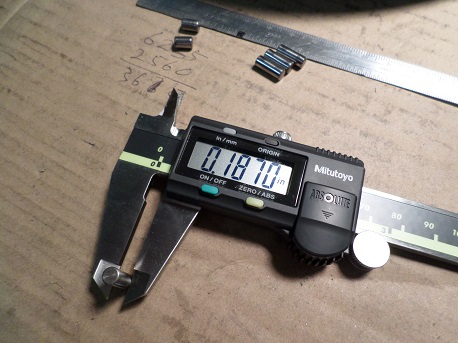
The standard factory width for the bushing rollers is .1562" O.D. They are also offered in several oversizes to compensate for pinion race wear. Do not mix sizes!
TIP: Check each individual roller with a digital caliper or micrometer.
Read: Best Digital Caliper For Engine Building
*********************
Thrust Washers
Keep track of the thrust washers at the ends of both shafts. The mainshaft and countershaft are two different I.D. sizes, so you can't mix them up.
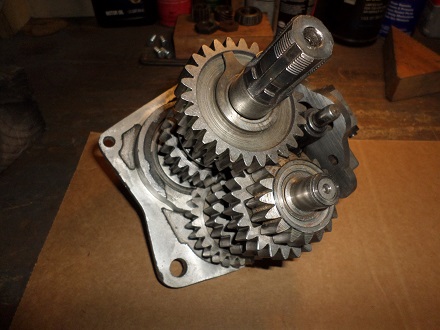
Mainshaft and Countershaft
The mainshaft is the one on top and is longer.
Mainshaft gears have five dogs each.
The countershaft is the one on the bottom and is shorter.
Countershaft gears have four dogs each.
Since it may be weeks or even months before the transmission is re-installed, note the order that things come out so you can reassemble it correctly. Write things out in a notebook, or take pictures.
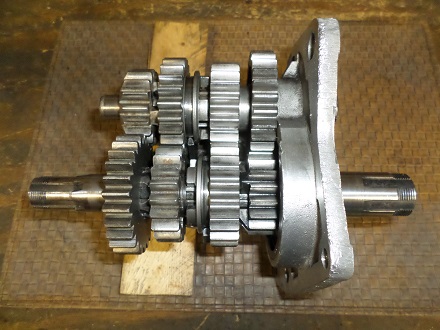
If you mix up the transmission gears, remember that MS gears have five dogs, and CS gears have four dogs.
The MS gears are installed "big-small-big-small", so CS gears will install "small-big-small-big".
*********************
Shifter Shaft
After the play in both shafts are checked and corrected (see below), it's time to install the shifter shaft. The shifter shaft is also referred to as the shift shaft, shift lever, inner gear shaft, or lever arm shaft.
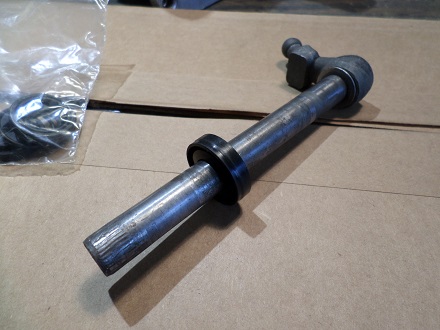
There are two kinds of shifter-shafts used on Ironheads. Early models (like the one shown) have smooth splines, and later Ironheads (1977-1985) have shaft ends that are splined. The two styles will interchange.
To me, the early design seems to make more sense--if the bike fell on it's side, a splined shifter would break or bend. This would mean removing the primary cover, primary chain, gears, clutch, and transmission. A smooth shaft would merely be pushed up, which could loosened, spun back, and re-tightened.
Before the transmission assembly goes back in, install the shifter shaft into the right-side engine case. For proper shifting, the shift lever arm needs to be centered.
TIP: A dab of automotive wheel bearing grease will hold it in place will installing.
Mark the shaft at the 12 o'clock position with a felt-tip marker, then you can tell if the arm position changes when installing.
******************
Install Bushing Rollers
First, install the flat washer that sits between the rollers and the spring circlip on the outside.
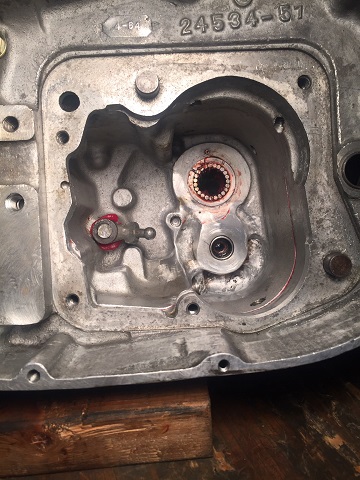
A dab of wheel bearing grease will hold the 23 rollers into the bearing race. The grease dissolves into the oil with the heat of a running engine.
********************
Install Unit
Install the assembly back into the engine cases, aligning the two dowel pins in their respective holes. The trap door should fit snug over the dowels. If it doesn't, stop and find out why.
There are four 5/16-18 bolts which hold the trap door on. As per the factory parts catalog, washers are not needed.
Caution!
Any time a steel bolt is going into an alloy housing, there is a good chance of it being over-tightened, or having already been over-tightened previously -- and just a ratchet-turn away stripping the threads!
If this has happened, consider installing a Heli-coil.
The trap door bolts only need to be about 15 foot/pounds or so. Like most mechanics, I don't trust my torque wrench that low on a foot/pound scale.
It would be best to use an inch-pounds torque wrench (15 foot pounds = 180 inch pounds).
Alternative: If the bolts and bolt holes are clean, install them finger-tight, then add an 1/8th turn with a 3/8-drive ratchet. Adding a small drop of Loctite to the bolt threads will probably make you feel better.
********************
Mainshaft Oil Seal
V-Twin Mfg Oil Retainer Kit fits 1952 through E1984 Harley K-Models and Sportsters. Kit includes seal, metal retainer, gasket, and four screws with washers.
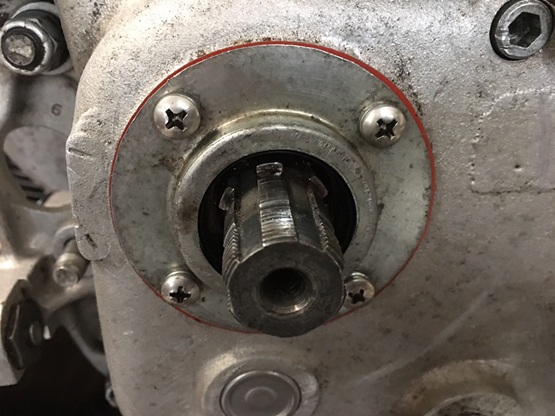
No gasket sealant needed.
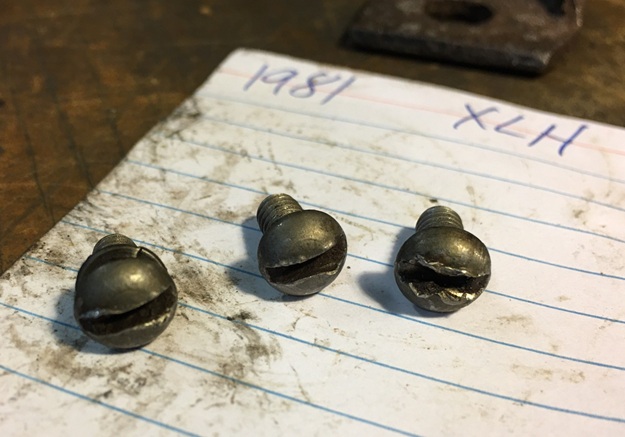
If your old retainer screws looks like these, it tells you that whoever was in there last couldn't be bothered using the proper tools!
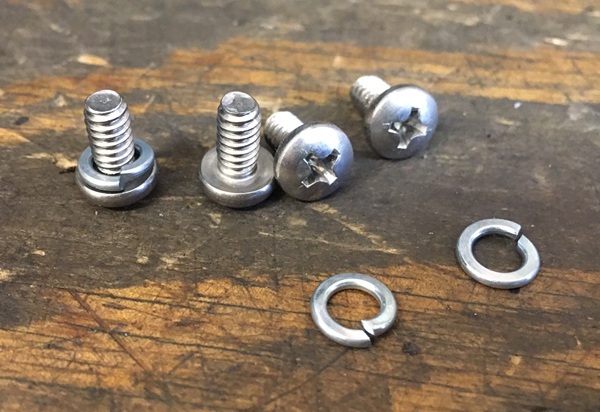
Correct screws are 10-32 x 3/8" length, with #10 lock washers.
********************
Check End Play
After the transmission assembly is back in, the mainshaft and countershaft end play needs to be checked and adjusted. You'll need a dial indicator to correctly measure end play.
Mainshaft End Play
Install and tighten the four bolts in the access cover.
Moving the mainshaft back and forth, measure the end play from the left side (trap door side).
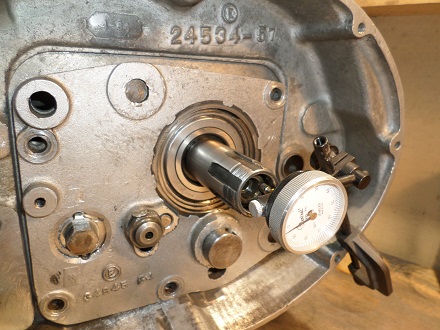
The factory manual states that main-shaft end play should be between .015"to .025". Mainshaft thrust washers are available in assorted sizes.
Countershaft End Play
Install and tighten the four bolts in the access cover.
With an old spoke or other suitable wire, push into the bottom hole on the right side of engine. You will need to knock out the needle roller bearing from the inside to do this.
Measure end play from the left side with dial indicator while pushing and pulling counter-shaft.
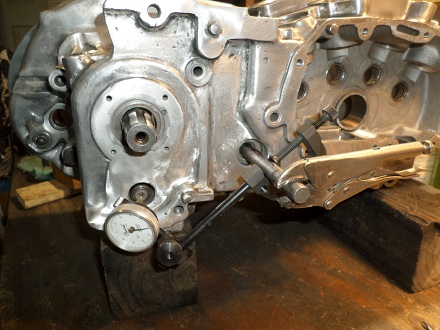
The factory manual recommends CS end play should be between .004"to .009". CS thrust washers are available in assorted sizes.
Once the transmission is back in the engine cases, check that the shifter shaft is correctly engaged with the shifter pawl.
Bench-Check All Gears
Check all four gears (including neutral) by shifting the transmission by hand.
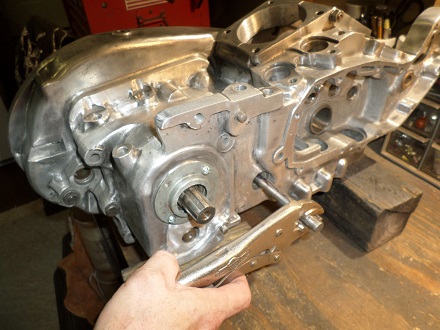
I'll shift through the gears with a pair of Vice-grips attached to the shifter-shaft. Alternatively, you could temporarily install the foot shift lever.
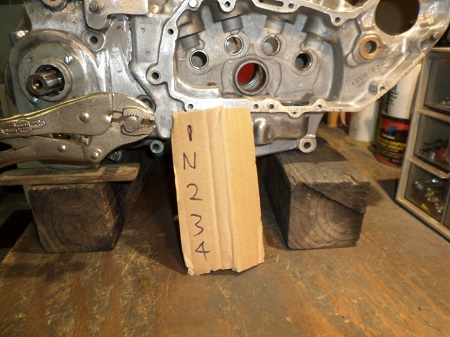
You should feel only a slight resistance, and hear a solid "clunk" when the gears engage.
********************
Parts Interchange
Gears, springs, forks, thrust washers, bearings, bushings, hardware--nearly all transmission parts interchange between 1952 through 1990 K-Model and Sportsters.
Shop: Ironhead Transmission Parts
Transmission/Primary Oil
On Ironhead Sportsters, transmission/primary oil is the same as engine oil.
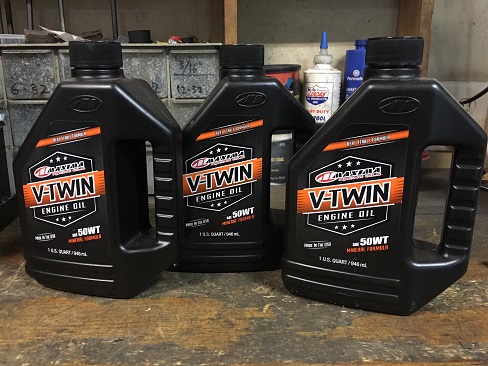
Maxima V-Twin mineral oil is a good choice for old Harleys. It's also offered in synthetic.
******************
Related Articles: