Harley 45 Drivetrain
Article by Mark Trotta
This article details how to install transmission, primary chain, and clutch on Harley 45 flatheads. The procedures are essentially the same for all 1941 through 1973 models.
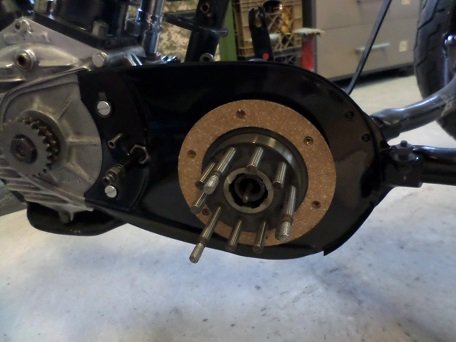
With the transmission in place but not tightened, the inner primary cover can be installed, then the clutch hub. This is done by tapping it onto the transmission sprocket with a hammer and block of wood or a large socket. I used a 38mm axle socket.
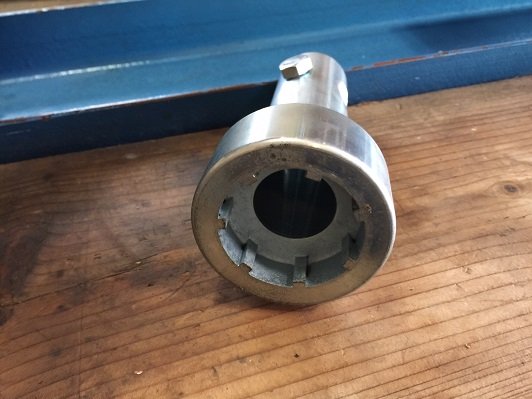
Tightening the clutch hub nut with lock-washer calls for a special hub nut socket.
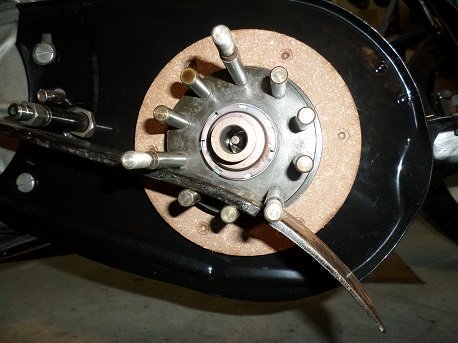
As an alternative to the tool, place a crowbar between the studs and the center primary cover bolt. This will hold the hub in place while tightening the nut.
Harley 45 Primary Chain
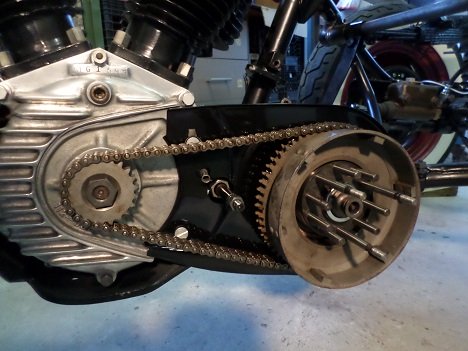
The primary chain, motor sprocket, and clutch drum/sprocket are installed at the same time. Loosen the three transmission mounting bolts and slide the unit all the way forward. Once the chain and sprockets are on, leave them loose until the after the next step.
Big Fix Clutch Kit
Originally designed to save a damaged hub with ball bearing grooves, the Big Fix kit is often preferred over the original ball bearings and cage design. Included in the kit are 52 long rollers, three spring rings, and a retaining plate to replace the original steel one in the clutch.
The Big Fix kit fits Harley 45 WL models 1941-1952 and G (Servi-car) models 1941-1973. When installed with the correct clearance, the bearings will not jam or lock up.
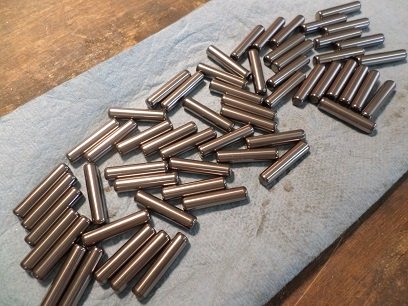
Shop: Big Fix Clutch Kit
When installing the clutch hub rollers, lightly coat them with a good quality high-temperature bearing grease, just enough to coat the bearings and put a layer on the hub and pulley race.
The retaining plate is held in place with three small spring rings. Lightly push the spring clips onto three short studs of the clutch.
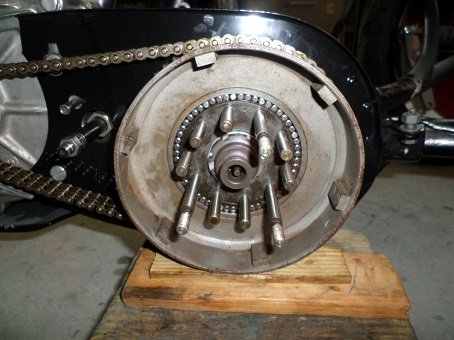
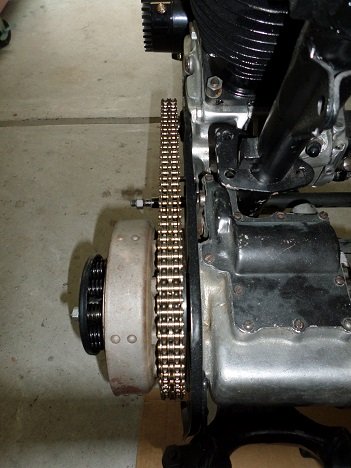
At this point you can adjust the primary chain by sliding the transmission unit back and tightening the three 9/16" bolts. You want to have no less than 1/2" of up and down play in the chain.
Harley 45 Clutch Install
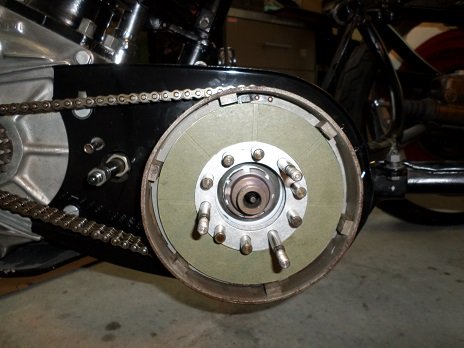
Harley 45 clutch installation is as follows:
First install a friction disc, then a steel disc (with the word "out" facing out), another friction disc, and another steel disc. Stagger the second steel disc from the first so it goes into the drum on different splines. The clutch "half" plate goes last, with the friction side in and metal side out.
Clutch Hub Releasing Assembly
For the next step, scrounge up three long 5/16" bolts and a flat washer with an O.D. of at least 1". Set the clutch outer disc on a flat surface and stand the ten springs over the 10 holes, then set the clutch pressure plate on top of them.
Install the push-rod adjusting screw with the washer into the releasing disc and tighten, making sure the springs are straight. Once the springs have slight pressure on them, you can slide out the three loose bolts and your clutch hub assembly is ready to be installed.
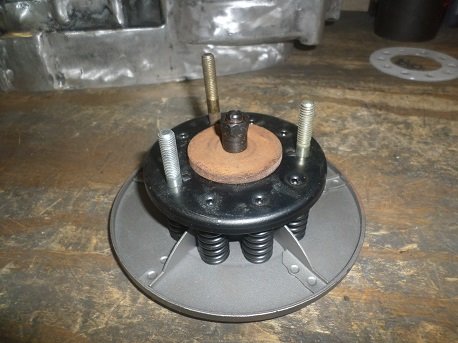
Place the assembled hub assembly onto the transmission gear shaft. Hand-tighten the three 5/16" drive-stud nuts onto the three long bolts.
After a few turns with a wrench, you will be able to remove the big washer and thread the adjusting screw back into the pressure plate.
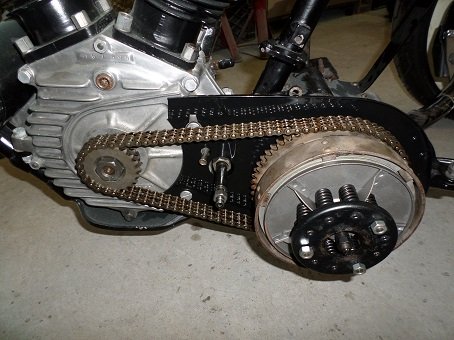
Clutch adjustment is made by turning the push-rod adjusting screw into the releasing disc, then tightening the lock nut. Correct distance from the back of the pressure plate to the front of the clutch is 31/32" for 1967 and earlier Servi-cars and 1-1/32" for 1968 and later Servi-cars.
Outer Primary Chain Cover
There are two different styles of kick-start primary chain cover. Early covers had a small inspection cover, and later ones had a larger inspection cover which allowed for easier clutch adjustments.
I did not have a primary cover for this bike, and people seem to be asking way too much for a 60 year-old piece of rusted and dented metal. So I went aftermarket, which do have slight cosmetic differences from original Harley primary covers, but nothing that affects performance.
Harley Servi-car Kick Pedal
Kick-start Servi-cars use a special sprocket cover (part #34871-41) on the transmission with an extension shaft (#33093-41) and bushing (#33101-32) which moves the crank further away from the transmission. The starter crank attaches to the extension shaft.
Harley Davidson offered the bicycle-style kick-pedal on various models since 1917. These include 45" Solos (except WL and WLC), Servi-cars, Big-Twin Flatheads, and also Knuckleheads and Panheads. Pedal-blocks were offered in red, white, blue or black for riders who wanted to color co-ordinate their bikes.
*************************
Related Articles: